How to Start Greenhouse Farming for Beginners: A Step-by-Step Guide (2026)
By Farmers Advisory Editorial Team ·
Published August 5, 2026 · Updated August 5, 2026 · 11 min read ·
Category: Greenhouse Farming
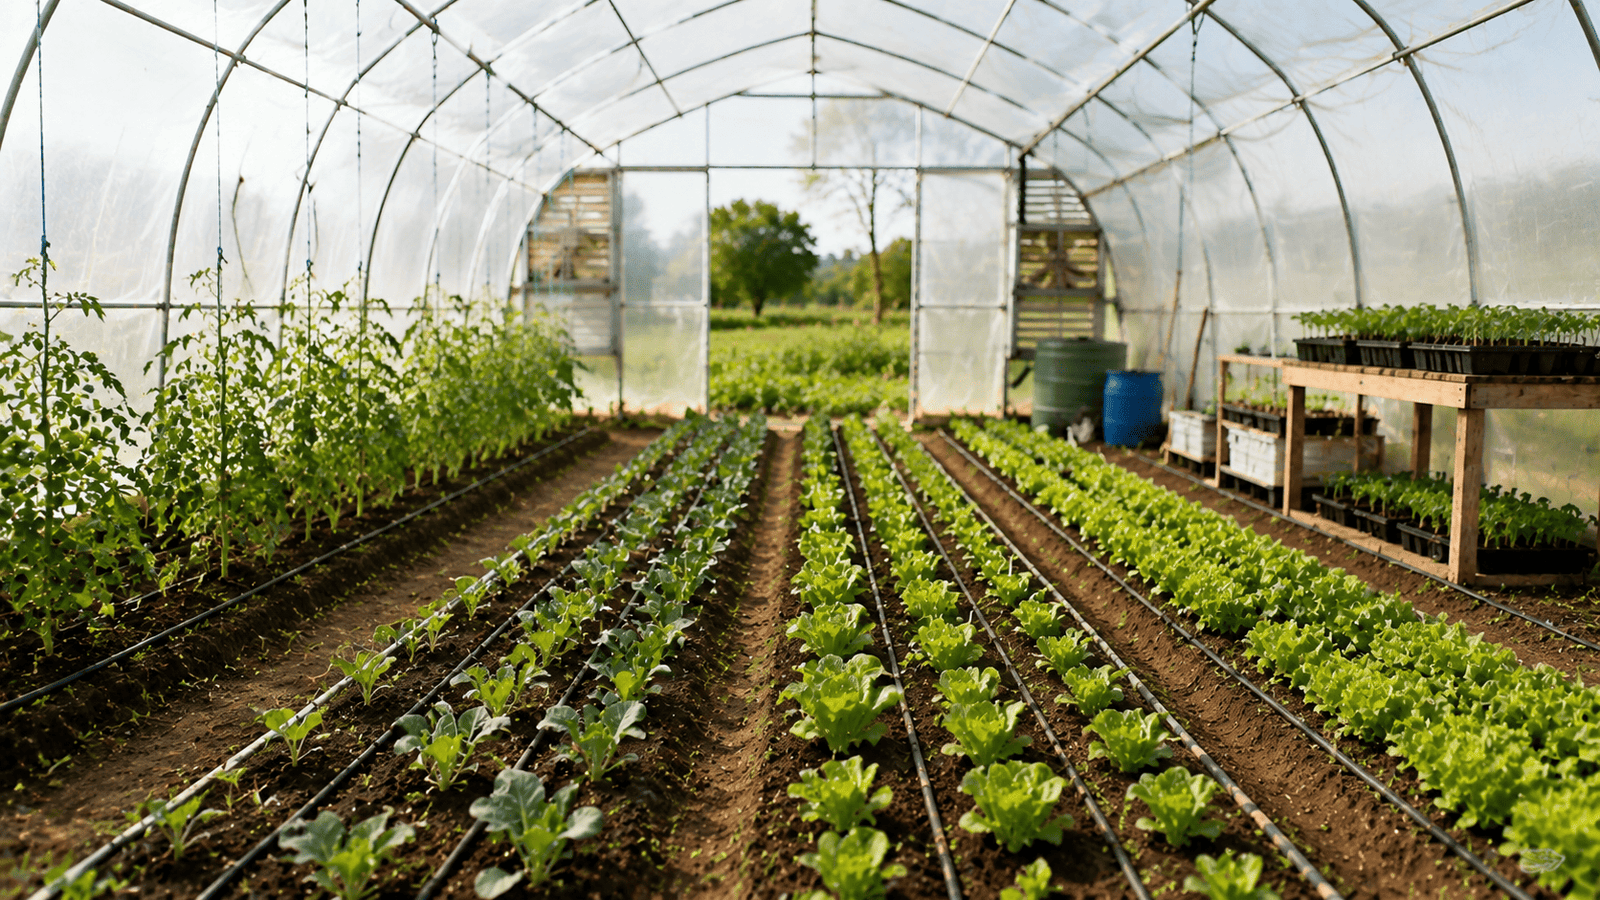
A well-planned beginner greenhouse succeeds or fails on a handful of fundamentals: site, structure, irrigation, and climate control.
Greenhouse farming lets you grow crops on a schedule the open field can't match — earlier planting,
later harvests, and protection from wind, hail, and unpredictable rainfall. It also comes with real
costs and a learning curve that trips up a lot of first-time growers. This guide walks through
how to start greenhouse farming from a beginner's position: picking a site, choosing
a structure, setting up irrigation and growing media, selecting crops, and managing the climate inside
once seedlings go in the ground.
Key Takeaways
Site selection — sunlight, drainage, water access, and wind exposure — determines more of your long-term success than the greenhouse structure itself.
Match greenhouse type and size to your budget, climate, and crop plan rather than buying the biggest structure you can afford.
Growing media and irrigation setup should be decided before construction finishes, not improvised afterward.
Temperature and humidity swings, not pests, are the most common reason beginner greenhouse crops underperform in the first season.
Start with one or two crops you already understand, and expand only after you've managed a full growing cycle successfully.
What Is Greenhouse Farming?
Greenhouse farming, also called protected agriculture or controlled environment agriculture, means
growing crops inside a covered structure that moderates temperature, humidity, light, and airflow. The
covering — usually polyethylene film, polycarbonate panels, or glass — traps solar heat and blocks wind,
rain, and many pests, giving the grower far more control over growing conditions than an open field
provides. That control is the entire value proposition: it lets you extend the growing season, protect
sensitive crops, and often push more harvest cycles into a single year.
Benefits and Limitations
✅ Benefits
Extended growing season and earlier/later harvests than open-field crops
Protection from wind, hail, heavy rain, and many field pests
Higher potential yield per square meter with intensive management
More consistent water use through drip or fertigation systems
❌ Limitations
Higher upfront investment than open-field cultivation
Requires ongoing attention — ventilation and irrigation can't be neglected for long
Humid, enclosed conditions can favor certain fungal diseases if unmanaged
Energy or labor costs for cooling, heating, or ventilation depending on climate
1. Choosing the Location
Location decisions are difficult and expensive to reverse once a greenhouse is built, so they deserve
the most upfront care.
Sunlight: pick a site with unobstructed sun for most of the day — nearby trees or buildings that cast shade will limit crop growth regardless of greenhouse quality
Wind exposure: some shelter from prevailing winds reduces structural stress and heat loss, but avoid deep pockets with no airflow at all
Water availability: confirm a reliable water source close to the site — hauling water long distances is one of the most common reasons beginner greenhouses stall
Drainage: avoid low-lying areas that pool water after rain; standing water around the foundation encourages disease and structural problems
Soil: even greenhouses using growing media benefit from decent underlying soil drainage; heavy clay sites may need additional grading
Climate: local temperature extremes, humidity, and seasonal patterns shape which greenhouse type and climate-control investment actually make sense
2. Choosing Greenhouse Type and Size
Beginners don't need the most advanced structure available — they need one that matches their budget,
local climate, and planned crop mix. Common beginner-friendly options include hoop houses (low-cost,
simple to build), gothic arch structures (better snow and rain shedding), and gable-roof greenhouses
(more headroom, easier ventilation). A detailed breakdown of structure types and how to choose between
them is covered in our greenhouse types comparison guide.
Start smaller than your ambition — a modest structure that's fully managed well outperforms a large one that's under-managed
Covering material (polyethylene film, polycarbonate, or glass) affects cost, light transmission, insulation, and lifespan
Leave room in your plan for pathways, storage, and future expansion rather than filling every square meter with beds on day one
💡 Quick Tip
Visit an operating greenhouse near you — a neighbor's, a demonstration farm, or an agricultural extension site — before finalizing your structure choice. Seeing how a real structure holds up through a season teaches more than any spec sheet.
3. Site Preparation and Foundation
Clear vegetation, level the ground, and address drainage before any structural work begins
Foundation requirements scale with greenhouse size and local wind/snow loads — larger or permanent structures generally need a proper footing, while small hoop houses may only need secured ground anchors
Plan pathways and bed layout on paper first so irrigation lines and walkways don't fight for the same space later
Where structural safety is a real concern — larger spans, high wind zones, heavy snow areas — consult local building guidance or a professional before construction
4. Irrigation and Growing Media
Drip irrigation is the most common beginner choice — it delivers water directly to the root zone, reduces disease pressure from wet foliage, and uses water efficiently
Decide early whether you're growing in native soil beds, raised beds, containers, or a soilless growing media, since irrigation design differs for each
Growing media should drain well but retain enough moisture between waterings — heavy garden soil straight from the ground is rarely a good fit inside a greenhouse bed
Install irrigation lines before planting, not after — retrofitting drip lines around established crops wastes time and often damages roots
5. Crop Selection and Seedlings
Beginner success depends heavily on choosing crops that match your climate control capacity and your
own experience. Tomatoes, cucumbers, peppers, and leafy greens are common starting points because they
tolerate a range of conditions and have predictable growth patterns. A full comparison of crop options
and their requirements is available in our
best crops for greenhouses guide.
Start with seedlings from a trusted nursery for your first cycle rather than starting everything from seed, to reduce the number of variables you're managing at once
Space plants according to their mature size, not their seedling size — overcrowding is a common first-season mistake
Stagger plantings where practical so harvest and labor don't all land in the same week
6. Temperature, Humidity, and Ventilation
Climate management is where most beginner greenhouses succeed or fail. Temperature and humidity
requirements vary by crop and growth stage, so there's no single target that fits every situation — our
temperature and humidity control guide
covers this in depth. At minimum, plan for:
Roof or side vents for natural airflow, sized to your greenhouse volume
Shade cloth for hot-season protection if your climate runs warm
A basic thermometer/hygrometer, or a low-cost sensor setup, so you're reacting to actual readings rather than guesswork
A plan for supplemental heating if your region sees cold nights during the growing season
⚠️ Common Mistake
Closing a greenhouse completely on a sunny day. Internal temperatures can climb far above outside air temperature within minutes without ventilation, stressing or killing seedlings even in cool climates.
7. Pest Management and Fertilization
Inspect plants regularly — catching pest or disease problems early is far easier to manage than an established outbreak
Screening doors and vents helps keep flying insects out without shutting off airflow entirely
Base fertilization on your crop's actual needs and your growing media, not a generic schedule — soilless media in particular often needs a full fertigation program rather than occasional feeding
Harvest at the correct maturity stage for each crop — over-mature produce often has a shorter shelf life and lower market value
Handle harvested produce gently and get it out of direct heat quickly to preserve quality
Basic cleaning, sorting, and appropriate packaging materially affect what price your produce can command
Keep simple records of yield, timing, and problems each cycle — this data becomes the foundation for planning your second season and, eventually, a
greenhouse business plan
Common Beginner Mistakes
Frequent First-Season Greenhouse Mistakes
Mistake
Consequence
Simple Fix
Oversized structure for available time/budget
Under-managed beds, wasted space
Start smaller, expand after one full cycle
No ventilation plan
Heat stress, scorched seedlings
Install vents sized to greenhouse volume before planting
How much space do I need to start greenhouse farming?
There's no fixed minimum — small hobby greenhouses can be a few square meters, while commercial
operations run to thousands. Beginners generally do better starting with a modest structure they
can fully manage before expanding.
Do I need heating and cooling equipment to start?
It depends on your climate. Mild climates may only need shade cloth and natural ventilation, while
regions with cold nights or hot summers typically need supplemental heating or cooling to protect
crops through the full season.
What is the easiest crop to start with in a greenhouse?
Leafy greens and tomatoes are common beginner choices because they tolerate a range of conditions
and have predictable, well-documented growth requirements, though the right choice depends on your
climate and market.
Can I build a greenhouse myself without professional help?
Small hoop houses and simple structures are commonly self-built. Larger structures, or sites with
significant wind or snow loads, benefit from professional input on the foundation and framing to
ensure the structure holds up.
How long does it take to see a harvest after starting a greenhouse?
This varies by crop — leafy greens can be ready in a few weeks, while fruiting crops like tomatoes
typically take two to three months from transplant to first harvest.
Is greenhouse farming profitable for beginners?
Profitability depends on crop choice, local market prices, energy costs, and management skill.
Our cost and profit analysis guide
breaks down the variables involved rather than promising a fixed return.
What's the biggest mistake beginners make in greenhouse farming?
Underestimating climate control. Many beginners focus on the structure and crops but neglect
ventilation and temperature monitoring, which is where most early crop losses actually happen.
Conclusion
Starting greenhouse farming successfully comes down to sequencing the fundamentals correctly: pick a
site with reliable sun, water, and drainage; choose a structure that matches your budget and climate;
get irrigation and growing media sorted before planting; and treat ventilation and temperature monitoring
as daily, not occasional, tasks. Most first-season failures trace back to skipping one of these basics
rather than any deeper horticultural skill gap. Get them right on a modest scale, and you'll have a
realistic foundation to expand from in your second season.
Want more greenhouse farming guidance delivered to your inbox every week?
Data sources: USDA National Institute of Food and Agriculture, protected agriculture resources; Penn
State Extension, greenhouse vegetable production guidance; University of Massachusetts Amherst
Extension, greenhouse crop production guides; Cornell University Cooperative Extension, greenhouse and
high tunnel resources; and North Carolina State University Extension, greenhouse production guides.
Practices vary by climate, structure, and crop; figures represent general guidance current as of
August 2026.
 Farmers Advisory